
Table of Contents
- Start With Your Kitchen Layout and Island Dimensions
- Choose the Wood and Construction for Your Reclaimed Wood Kitchen Island
- Plan Your Custom Butcher Block Island Design
- What Drives Reclaimed Wood Kitchen Island Cost
- Hardware, Storage, and Appliance Integration
- How to Clean a Reclaimed Wood Kitchen Island
- Verify Sustainability and Reclaimed Wood Safety
- Conclusion
- Frequently Asked Questions
Last Updated: September 10, 2026
Start With Your Kitchen Layout and Island Dimensions
The biggest mistake buyers make is ordering a reclaimed wood kitchen island before measuring the room. An island that doesn't fit your walkways is an expensive error: measure first.
Strong Oaks Woodshop has completed more than 10,000 projects since 2008, and cramped kitchens almost always skipped the clearance math.
Measuring for Seating Overhang and Walkway Clearance
Walkway clearance is the distance between your island and surrounding cabinets or walls. Most designers target at least 36 inches for a single cook and 42 to 48 inches when two people pass behind seated diners.
Seating overhang matters too: a stool needs roughly 12 inches for knees to clear the base cabinet, and 15 inches feels more comfortable for full meals.
Write down four numbers before you contact any maker:
- Total available floor length and width
- Distance to the nearest wall or appliance on every side
- Desired seating count and overhang depth
- Ceiling height if you want a hanging pot rack
Choose the Wood and Construction for Your Reclaimed Wood Kitchen Island
Wood choice and joinery determine whether your island lasts a decade or a lifetime. Reclaimed material brings character, but the construction underneath decides durability.
Reclaimed Barnwood, Wood Slabs, and Grainery Board Options
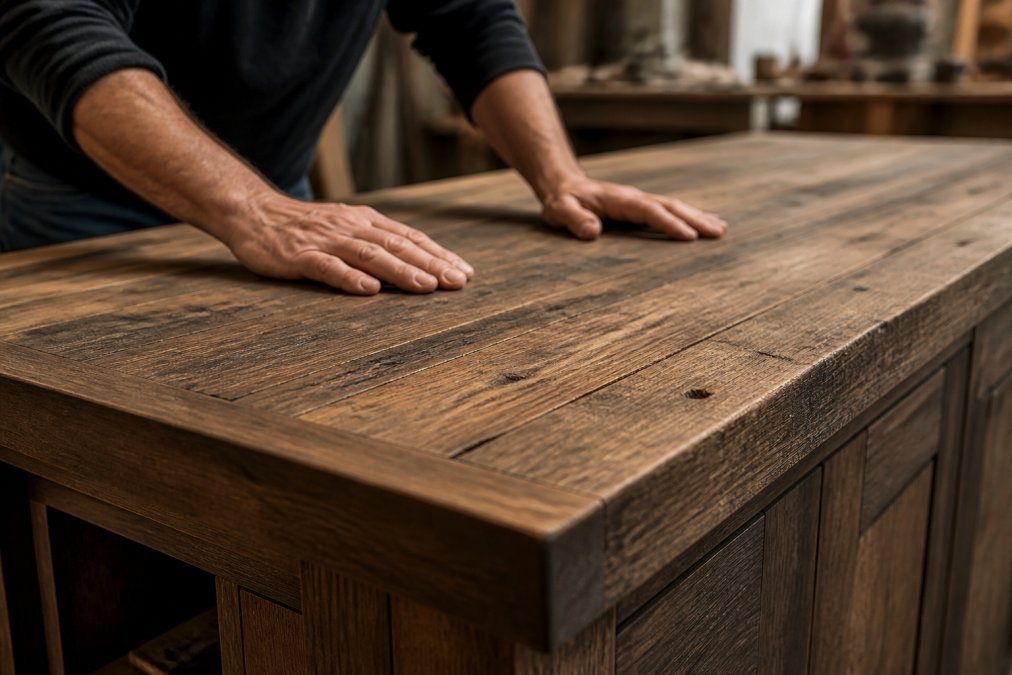
Reclaimed barnwood carries a century of patina, nail marks, and weathered texture new lumber can't replicate. Wood slabs give you a single continuous surface with dramatic grain. Grainery board, salvaged from old grain bins, is denser and straighter, a strong pick for butcher block top sections.
Joinery, Hardwood Face Frames, and Dovetail Drawers
Furniture-grade construction separates an heirloom from a disposable piece. Look for a hardwood face frame that keeps the base cabinet square, dovetail drawers that resist pulling apart under load, and solid wood rather than particleboard cores. Ask directly how the drawers are joined and whether the frame is solid hardwood.
Plan Your Custom Butcher Block Island Design
A custom butcher block island design starts with the top, because countertop thickness drives both look and function. Standard tops run 1.5 to 2 inches thick, while slabs up to 3 inches create a heavier presence.
Countertop Thickness, Finish, and Protective Sealant
Thicker tops resist warping and give you more material to sand down over the years. For a working prep station, a butcher block top finished with food-safe oil is the practical choice; for a surface that mostly holds platters, a polyurethane or hardwax oil sealant handles spills with less upkeep. Ask your maker which finish they apply and how often it needs refreshing.
| Design Decision | Best For | Trade-Off |
|---|---|---|
| 1.5-inch top | Standard kitchens, lighter look | Less material for future sanding |
| 2 to 3-inch top | Prep stations, statement pieces | Heavier, needs stronger base |
| Food-safe oil finish | Chopping and food prep | Re-oil every few months |
| Hardwax or poly sealant | Low-maintenance surfaces | Not ideal for direct chopping |
What Drives Reclaimed Wood Kitchen Island Cost
Reclaimed wood kitchen island cost depends on material rarity, size, joinery complexity, and finish, not a single sticker price. Because every piece is made-to-order, pricing is quoted per project.
Four factors move the number most:
- Wood species and provenance (barnwood, grainery board, or slab)
- Overall dimensions and countertop thickness
- Storage capacity, including drawer count and dovetail joinery
- Custom hardware, seating overhang, and finish selection
Strong Oaks Woodshop quotes each project individually, so the honest answer to "what will it cost" is: it depends on your specifications. Request a quote with your measurements and design choices.
Hardware, Storage, and Appliance Integration
Storage and appliance fit turn a beautiful island into a functional one. Plan drawers, doors, and outlets before the build starts, because retrofitting a base cabinet after delivery is difficult and sometimes impossible without cutting into a finished face frame.
Drawer and Door Layouts That Actually Work
A working island usually mixes three drawer depths. Shallow drawers (3 to 5 inches) hold utensils, linens, and flatware. Mid-depth drawers (6 to 9 inches) take plates, mixing bowls, and small appliances. Deep drawers (10 to 12 inches) swallow stockpots, sheet pans, and stand mixers. A common pattern is one deep drawer bank on the prep side and two or three shallow drawers on the seating side. Add a dedicated trash pull-out (15 to 18 inches wide to clear a standard 13-gallon bin) and a vertical baking sheet slot if space allows, both are cheap at build time and awkward to add later.
Wiring Outlets, Lighting, and Charging Into a Wood Island
The biggest integration question is electrical. A wood island is not a wall, so power arrives one of three ways:
- Floor outlet under the island. An electrician cuts a box into the finished floor and runs conduit up through the base cabinet. Cleanest look, requires a floor cut and a licensed electrician.
- Ceiling drop. A pendant or a cord drop from the ceiling carries power down. Easier to install, but the cord is visible.
- Conduit from an adjacent wall. Sometimes possible if the island sits near a wall with an accessible circuit, but the run is often longer than it looks.
Specify outlet locations before the base cabinet is framed. A pop-up outlet tower set into the countertop disappears when not in use, but needs a clear 3- to 4-inch-deep cavity below the counter and a GFCI-protected circuit.
Fitting a Beverage Fridge, Microwave, or Prep Sink
Built-in appliances need three things specified up front: rough opening dimensions, ventilation, and a dedicated circuit.
- Beverage fridge. Most undercounter units need a rough opening around 24 inches wide, 34 inches tall, and 24 inches deep, plus 1 to 2 inches of clearance behind and above for heat to escape. Without that vent gap, the compressor works harder and the unit fails early. Confirm the exact model's spec sheet before the cabinet is built.
- Microwave drawer or built-in microwave. Drawer models need a dedicated 120V circuit and a rough opening sized to the unit. A trim kit hides the gap between the appliance face and the wood frame.
- Prep sink. A small bar or prep sink (typically 12 to 16 inches wide) needs a rough-in for supply lines and a drain, plus a P-trap below. If the island sits over a slab, the drain has to run to the nearest stack, which can mean breaking concrete. Confirm the drain path before committing.
Matching Island Height to Existing Counters
Standard counter height is 36 inches. A prep island is often raised to 38 or 39 inches so a taller cook isn't hunched over, while a seating-side counter is sometimes dropped to 30 inches (table height) or 36 inches (counter height) depending on the stools. Decide the height before the base is built, because it drives the leg and frame dimensions.
How to Clean a Reclaimed Wood Kitchen Island
Learning how to clean a reclaimed wood kitchen island protects both the finish and the patina you paid for. Daily care is simple: wipe with a soft damp cloth and mild soap, then dry immediately. Avoid soaking the surface, standing water raises the grain and can work under a sealant over time. Skip abrasive scrubbers and ammonia-based cleaners, which dull the finish.
Routine Care and Long-Term Maintenance
Routine care keeps a sealed top in good shape for years. For oiled butcher block, reapply food-safe oil when the surface looks dry, usually every few months. Expect to lightly sand and re-seal every few years, especially around a prep station that sees daily chopping.
| Task | Frequency | What to Use |
|---|---|---|
| Wipe down after use | Daily | Damp cloth, mild soap |
| Re-oil oiled tops | Every few months | Food-safe mineral oil |
| Deep clean and re-seal | Every 2 to 3 years | Mild cleaner, fresh sealant |
Verify Sustainability and Reclaimed Wood Safety
Sustainability and safety are the two questions every reclaimed buyer should ask, and most product pages skip them entirely. Reclaimed wood is genuinely sustainable because it diverts material from the waste stream, but "reclaimed" is not a regulated term, so provenance and processing are what you're actually buying.
Where Reclaimed Wood Actually Comes From
Three provenance categories cover most of the market:
- Barnwood. Salvaged from dismantled agricultural barns, typically 80 to 150 years old. Heavy patina, nail holes, and weathered gray faces. The most common source and most recognizable look.
- Industrial salvage. Beams, flooring, and decking from old factories, warehouses, and mills. Often denser old-growth species (longleaf pine, heart pine, American chestnut) with straight grain and fewer knots. More uniform, less rustic.
- Grainery and bin board. Salvaged from grain bins and elevators. Dense, straight, and often cleaner-faced than barnwood, which is why it works well for butcher block sections.
Ask your maker which category your island will use and, if possible, which building or region it came from.
How Reputable Makers Inspect and Process Salvaged Lumber
Old lumber can carry lead paint, creosote, or chemical treatments from its previous life. A responsible shop runs a consistent process before the wood becomes furniture:
- Visual sort. Boards with obvious paint, staining, or treatment are set aside.
- Metal detection. A scan catches nails, staples, and bullets that would destroy a planer blade, and that a buyer doesn't want buried in a countertop.
- Lead test. Painted or unknown-origin stock is tested with a kit or sent to a lab. Painted surfaces are planed off or the board is rejected.
- Kiln drying. Reclaimed stock is dried to a stable moisture content (typically 6 to 8 percent) so the finished top doesn't move after installation.
- Cleaning and surfacing. Boards are planed, sanded, and finished with a food-safe oil or sealant if the surface will see food contact.
Ask your maker which steps they perform in-house and which they rely on a supplier for. The answer tells you how much control they have over what ends up in your kitchen.
What to Ask Before You Buy
A short list of questions separates a serious reclaimed maker from a reseller:
- Where did this wood come from, and can you name the source?
- Do you test for lead on painted or unknown-origin stock?
- What finish do you use, and is it rated for food contact?
- Do you kiln-dry in-house, or does the wood arrive at a stable moisture content?
- Can you provide documentation or photos of the salvage?
If a maker can't answer these, that's the answer.
The Sustainability Case, Honestly Stated
The environmental argument for reclaimed wood is straightforward: every board reused is a board not milled from a standing tree, and old-growth timber cut a century ago is effectively irreplaceable. That said, "reclaimed" alone doesn't guarantee low-impact processing, finishes, adhesives, and shipping carry their own footprint. Reclaimed material is a meaningful improvement over virgin old-growth lumber, not a zero-impact choice.
For broader guidance on safe finishes and indoor air quality, the U.S. Environmental Protection Agency's indoor air quality resources outlines how to choose low-emission products, and the U.S. Consumer Product Safety Commission covers consumer product safety standards worth asking about. For lead-specific questions on older salvaged material, the U.S. Environmental Protection Agency's lead-safe certification resources explains what certified renovators look for.
Conclusion
The hard part of buying a custom reclaimed wood kitchen island isn't choosing a look, it's getting the measurements, joinery, and finish right before the build starts. Most disappointments trace back to a skipped clearance check or a vague quote, not the wood itself.
Strong Oaks Woodshop has hand-built reclaimed furniture since 2008, with 250+ barns reclaimed and 2,000+ five-star reviews behind the work. Every island is made-to-order to your exact dimensions, with dovetail drawers, hardwood face frames, and customizable finishes, plus on-time shipping and fast communication from quote to delivery.
Get started with Strong Oaks Woodshop and request a quote with your kitchen measurements to build an island that fits your space the first time.
Frequently Asked Questions
How much does a custom-built reclaimed wood kitchen island cost?
There is no single price because reclaimed wood kitchen island cost depends on size, wood species, butcher block top thickness, drawer count, hardware, and finish. A small prep station with open shelving sits at the low end, while a large island with dovetail drawers, seating overhang, and a thick end-grain top sits higher. Strong Oaks Woodshop quotes each project individually, so request a quote with your dimensions for current pricing.
Can you build an island that fits an odd kitchen layout?
Yes. Made-to-order builders work from your measurements, not a standard catalog size, so custom dimensions can follow an unusual footprint instead of leaving gaps. Measure the room, mark walkway clearance on the floor with tape, and note where the seating overhang should land. Send those numbers with photos of the space, and the shop can confirm what fits before anything is cut.
How do I clean a reclaimed wood kitchen island without damaging the finish?
Wipe daily with a soft damp cloth and a mild soap solution, then dry immediately so water does not sit on the protective sealant. Avoid soaking the surface, abrasive scrubbing pads, and ammonia-heavy cleaners that dull the finish. For the butcher block top, reapply a food-safe oil every few months when the wood looks dry. Deep clean sticky spots with a cloth wrung nearly dry rather than a wet sponge.
Is reclaimed wood durable enough for daily use with kids and pets?
Reclaimed hardwood is often older, denser growth than new lumber, and solid wood construction with proper joinery handles daily life well. The protective sealant matters more than the age of the wood, since it blocks moisture and stains. Expect some patina and small marks over time, which many owners treat as character rather than damage. Ask about the finish used and how often it needs refreshing.