
Table of Contents
- Why Cleaning Reclaimed Wood Furniture Is Different
- What You'll Need Before You Start
- Step 1: Daily Dusting and Routine Care
- Step 2: Deep Cleaning Reclaimed Wood Furniture
- Step 3: How to Remove Stains From Reclaimed Wood
- Choosing the Best Wood Cleaner for Barnwood Finishes
- Reclaimed Wood Furniture Maintenance: Seasonal Care and Protection
- What to Avoid and Common Mistakes
- Frequently Asked Questions
Last Updated: September 6, 2026
Why Cleaning Reclaimed Wood Furniture Is Different
Cleaning reclaimed wood furniture requires a different approach than caring for new, kiln-dried pieces because the material carries decades of history in its grain. Reclaimed wood is salvaged from old barns, factories, and warehouses, meaning it often has a roughsawn texture, natural patina, and a moisture content that behaves differently than virgin lumber. Treat the wood like the aged material it is.
The biggest mistake owners make is reaching for all-purpose spray cleaners, which contain harsh chemicals that strip the surface finish and dull the natural patina. Instead, the goal is to remove dirt and grime while preserving the character marks, nail holes, and color variations that give each piece its one-of-a-kind look.
Below is a complete cleaning system: daily dusting, deep cleaning methods, stain removal, and protective maintenance. The steps are simple, but the order matters.
What You'll Need Before You Start
Gather these supplies before you begin:
- Microfiber cloths (several, so you always have a clean one)
- Soft bristle brush or a brush sander with a gentle pad for textured areas
- Distilled white vinegar and a mild soap solution, such as castile soap
- A spray bottle for mixing your cleaning solution
- Clean water in a bucket for rinsing
- Wood conditioner or a protective finish like polyurethane, wax finish, or oil-based finish for the final step
- A vacuum with a soft brush attachment for crevices
Most of these items are already in your home. Avoid abrasive cleaners, bleach, and citrus-based cleaners, which can damage the wood grain and strip the sealer.
Step 1: Daily Dusting and Routine Care
Dusting is the single most important habit for reclaimed wood furniture maintenance, taking less than two minutes. Dust particles act like fine sandpaper, scratching the finish when something slides across them.
Use a dry microfiber cloth and wipe in the direction of the wood grain. For roughsawn texture and deep crevices, use the soft bristle brush to lift dust that a cloth cannot reach. Do not use feather dusters, which simply push particles around and can snag on splinters.
For everyday spills, wipe immediately with a damp cloth, not a wet one. Excess water is the enemy of reclaimed wood because it can raise the grain and seep into cracks where old joinery may be vulnerable. Air dry the surface afterward, and never let water pool on a tabletop or shelf.
Step 2: Deep Cleaning Reclaimed Wood Furniture
Deep cleaning reclaimed wood furniture should happen two to four times a year, depending on use. This removes the buildup of oils, grime, and environmental residue that daily dusting leaves behind.
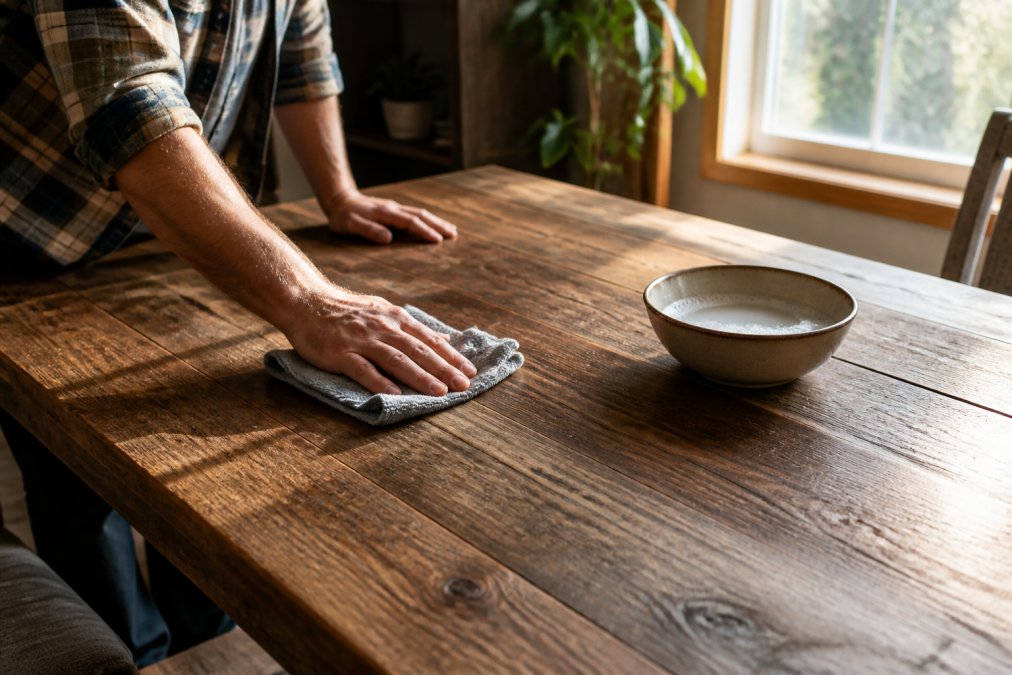
Start by vacuuming the entire surface with the soft brush attachment to remove loose debris from the grain. Then mix a mild soap solution: one teaspoon of castile soap in two cups of distilled water. Dip a microfiber cloth into the solution, wring it out thoroughly, and wipe the surface following the wood grain. The cloth should be damp, never dripping.
For stubborn buildup in textured areas, use the soft bristle brush dipped in the same solution and scrub gently in circular motions. Rinse the surface by wiping with a clean, damp cloth, then dry immediately with a fresh microfiber cloth. Let the piece air dry completely for several hours before applying any protective finish.
Step 3: How to Remove Stains From Reclaimed Wood
Stain removal on reclaimed wood is a two-step diagnosis: identify the stain type, then the finish underneath. The wrong solvent can permanently etch a polyurethane topcoat or dissolve a wax finish, so always test on an inconspicuous area first.
Step 3a: Identify the Finish First
Before you touch the stain, determine what is protecting the wood:
- Wax finish: Soft, low-sheen, and easily scratched with a fingernail. Water beads up briefly, then soaks in slowly.
- Oil finish (tung, linseed, Danish): Penetrates the wood, leaving a matte to satin sheen with no visible film. Water soaks in quickly.
- Polyurethane or lacquer: A hard, glossy or satin film that sits on top of the wood. Water beads and stays beaded.
A solvent that works on one finish will destroy another. Rubbing alcohol is safe on cured polyurethane but will soften and cloud a wax finish. Vinegar and olive oil is a classic remedy for water rings on wax or oil finishes, but on a polyurethane topcoat it does nothing, the ring is trapped in the film, not the wood.
Step 3b: Water Rings and White Heat Marks
White rings or hazy patches are moisture trapped in the finish, not the wood. The fix depends on the finish:
- Wax or oil finish: Mix equal parts distilled white vinegar and olive oil. Apply with a soft cloth, rub gently along the grain for 30-60 seconds, then buff with a clean, dry cloth. The oil reconditions the finish while the vinegar helps lift the trapped moisture.
- Polyurethane finish: The vinegar-and-oil method will not penetrate the film. Instead, place a clean, dry microfiber cloth over the ring and apply low heat with a hair dryer on its lowest setting, moving constantly. The heat drives the moisture out of the film. Keep the dryer 6-8 inches from the surface and never let it sit in one spot, reclaimed wood's uneven grain can scorch faster than new wood.
- Persistent white marks on any finish: If heat or vinegar fails, the mark may be a clouded or delaminated finish layer. This requires light sanding with 320-grit paper and a fresh topcoat, not more solvent.
Step 3c: Food, Grease, and Protein Stains
Grease and oil-based stains penetrate deeper because reclaimed wood is often more porous than new lumber, especially where old nail holes or checking have opened the grain.
- Fresh grease: Blot immediately with a dry paper towel, then sprinkle cornstarch or baking soda over the spot. Let it sit for 15-20 minutes to draw out the oil, then vacuum or brush it off. Follow with a damp cloth wipe and dry immediately.
- Set-in grease: Make a paste of baking soda and water (3 parts baking soda to 1 part water). Apply a 1/4-inch layer over the stain, cover with a damp cloth, and let it sit for 30 minutes. The moisture softens the grease while the baking soda absorbs it. Wipe away, rinse with a damp cloth, and dry thoroughly.
- Protein stains (milk, egg, blood): These respond to cold water, not hot. Hot water cooks the protein into the grain. Dab with a cloth dipped in cold water, blotting from the outside of the stain inward to avoid spreading. If residue remains, use a 1:10 dilution of distilled white vinegar to water, then rinse.
Step 3d: Ink, Dye, and Pigment Stains
Ink is the trickiest stain on reclaimed wood because the pigment can follow grain lines deep into the wood, especially on roughsawn surfaces.
- Ballpoint or gel ink: Dab, never rub, with a cotton swab dipped in 70% isopropyl alcohol. Rubbing spreads the pigment. Work from the outer edge toward the center, replacing the swab as soon as it picks up color.
- Permanent marker: Try a dry-erase marker first. Draw over the permanent ink, let it sit for 30 seconds, then wipe both away with a dry cloth. The solvent in the dry-erase ink lifts the permanent pigment without attacking the finish.
- Ink that has soaked into bare wood: If the stain is on an unfinished surface or has penetrated through the finish, alcohol will not lift it. Light sanding with 220-grit paper, followed by 320-grit, can remove the top layer of stained fibers. This removes the finish, so you will need to reapply a matching topcoat.
Step 3e: Rust and Tannin Stains
Reclaimed wood often carries rust stains from old nails, bolts, or metal hardware, appearing as dark gray or black streaks that follow the grain.
- Surface rust: Mix 1 tablespoon of lemon juice with 1 tablespoon of cream of tartar into a paste. Apply to the stain, let it sit for 10 minutes, then wipe away. Rinse with a damp cloth and dry immediately. Test on an inconspicuous spot first, the citric acid can lighten some finishes.
- Deep rust or tannin reactions: These are often not surface stains but chemical reactions between iron and the wood's natural tannins. They may darken over time and cannot be removed with surface cleaning. The only reliable fix is sanding below the stain depth, which may require removing 1/16 inch or more of material. On a piece with a valuable patina, consult a professional refinisher before attempting this.
Step 3f: When to Stop and Call a Professional
Reclaimed wood's value lies in its aged surface. Aggressive sanding, harsh solvents, or repeated failed attempts can cut through the patina, expose lighter virgin wood underneath, and permanently alter the piece's character. Call a professional if:
- The stain has penetrated more than 1/16 inch deep.
- The piece has a valuable original finish (e.g., milk paint, early shellac) that you do not want to strip.
- The stain covers more than 25% of the visible surface.
- You have tried two methods without success, further attempts risk more damage than the stain itself.
Choosing the Best Wood Cleaner for Barnwood Finishes
The best wood cleaner for barnwood finishes is not a single product, it is a system matched to your finish type and tested before full application. Most commercial all-purpose cleaners sit at a pH between 9 and 12 (alkaline), which is effective on grease but slowly breaks down the resin binders in polyurethane and wax finishes, causing hazing, dulling, and eventual finish failure over months of use (PubMed).
The pH Rule for Wood Cleaners
Wood finishes withstand a narrow pH range. A safe general rule:
- Polyurethane and lacquer: pH 6-8 (mildly acidic to neutral)
- Wax finishes: pH 6-7 (neutral only, wax is soft and dissolves in both acids and alkalis)
- Oil finishes (tung, linseed, Danish): pH 5-7 (slightly acidic is fine, but avoid alkaline soaps)
Most dish soaps and all-purpose cleaners fall outside this range. Castile soap, diluted to 1 teaspoon per 2 cups of water, sits near neutral pH 7 and is safe on all three finish types. Distilled white vinegar, diluted to 1 part vinegar to 4 parts water, has a pH around 3-4, safe for polyurethane and oil finishes but too acidic for wax.
Cleaner Selection by Finish Type
| Finish Type | Safe Cleaner | Avoid | Why |
|---|---|---|---|
| Polyurethane | pH-neutral cleaner (e.g., Murphy's Oil Soap diluted per label) or 1:4 vinegar-water | Bleach, ammonia, citrus degreasers | Alkaline products break down the urethane resin over time |
| Wax | Castile soap solution only | Vinegar, citrus cleaners, any solvent | Wax is soft; acids and solvents dissolve it |
| Oil finish | Castile soap or 1:4 vinegar-water | Alkaline soaps, ammonia | Alkalis saponify the oil, leaving a sticky film |
| Shellac (antique pieces) | Dry dusting only; damp cloth with plain water | Any cleaner with alcohol or ammonia | Alcohol dissolves shellac instantly |
Product Compatibility Testing: The 10-Minute Patch Test
Before using any cleaner on a visible surface, run a patch test on an inconspicuous area. This is especially critical on reclaimed wood, where different planks may have different original finishes or levels of porosity.
- Choose a 2-inch by 2-inch area on an unseen surface.
- Apply the cleaner at full strength and let it sit for 60 seconds.
- Wipe dry and inspect under bright light.
-
Wait 10 minutes and check again. Look for:
- Cloudiness or hazing in the finish
- Color change (darkening or lightening) in the wood
- Sticky or tacky residue
- Raised grain (rough texture where the wood was smooth)
- If any of these appear, the cleaner is too strong for that finish. Dilute it further or switch to a milder option.
What to Look for in a Commercial Cleaner
If you prefer a commercial product, read the label for:
- pH-neutral or pH-balanced on the front label
- No ammonia, bleach, or citrus oils in the ingredient list
- Water-based rather than solvent-based
- Designed for wood rather than multi-surface (multi-surface cleaners often contain abrasives or degreasers)
Two widely available options that meet these criteria are Murphy's Oil Soap and Bona Hardwood Floor Cleaner, both safe on polyurethane and oil finishes when used per label instructions. For wax finishes, skip commercial cleaners entirely, a dry microfiber cloth and occasional re-waxing is the safest routine.
The Homemade Solution That Works on Most Finishes
For routine cleaning of sealed reclaimed wood, a 1:10 dilution of distilled white vinegar to water (about 2 tablespoons per cup) is the most versatile homemade option. At this dilution, the pH rises to around 4.5-5, mild enough for polyurethane and oil finishes while still cutting through grease and grime. It is not safe for wax finishes.
Reclaimed Wood Furniture Maintenance: Seasonal Care and Protection
Seasonal care cycles protect reclaimed wood furniture from its biggest threat: changes in humidity. Wood is hygroscopic, absorbing and releasing moisture from the air. In winter, dry indoor air can cause planks to shrink and crack; in humid summers, wood expands and can bow or cup.
Monitor the room's humidity and aim to keep it between 35% and 45% if possible (canada.ca). In dry months, use a humidifier; in humid months, air conditioning or a dehumidifier helps keep the wood stable.
Reapply a protective finish once or twice a year. For wax finishes, apply a thin coat of paste wax, let it haze, and buff to a sheen. For oil-based finishes, wipe on a thin layer of boiled linseed oil or tung oil, let it penetrate for 15 minutes, and wipe off the excess.
What to Avoid and Common Mistakes
Several common mistakes shorten the life of reclaimed wood furniture, most stemming from treating it like a modern, factory-made piece. Avoid these:
- Abrasive cleaners and scouring pads: These scratch the surface finish and leave dull marks that are difficult to remove.
- Bleach and ammonia-based products: Bleach lightens wood unevenly and can damage the fibers. Ammonia strips finishes and leaves a residue.
- Citrus-based cleaners: The oils in citrus cleaners can penetrate and soften certain finishes, leaving a sticky film.
- Excess water: Standing water raises the grain, weakens joints, and can promote wood rot in unseen areas.
- Direct sunlight for extended periods: UV light fades the natural color and can dry out the wood, causing cracks.
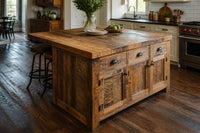
For a piece that will hold food, such as a butcher block kitchen island, use food-safe methods: wipe with a mild soap solution, disinfect with a diluted vinegar spray, and finish with a food-safe mineral oil. Never use bleach to sanitize a food-contact surface, as the wood will absorb the chemical.
Reclaimed wood is typically kiln-dried or heat-treated during processing, which eliminates wood-boring insects and their larvae (aphis.usda.gov). If you own a piece that was not professionally processed, inspect it periodically for small holes or fine sawdust, which signal an active pest infestation. Professional treatment is the only reliable solution.
Caring for reclaimed wood furniture is not complicated, but it does require a different mindset than caring for new furniture. The material's character, its nail holes, color variations, and roughsawn texture, is exactly what makes it valuable, and the right cleaning routine preserves that character rather than erasing it. At Strong Oaks Woodshop, every piece we build is hand-crafted from authentic reclaimed wood and finished to withstand daily use. Browse our collection to find a statement piece that will age gracefully with the right care.
Frequently Asked Questions
Is Murphy's Oil Soap safe for reclaimed wood furniture?
Yes, but only if the reclaimed wood has a sealed finish like polyurethane or a wax topcoat. For unsealed wood, the oil can soak in and leave a sticky residue that attracts dust. Always test on an inconspicuous spot first. Dilute it according to the label instructions. For most reclaimed wood furniture maintenance, a mild soap solution is safer and just as effective.
Can you use Dawn dish soap to clean wood furniture?
You can, but proceed with caution. Dish soap is a degreaser, so it can strip the natural oils and the protective finish from your reclaimed wood furniture over time. If you need to remove heavy grime, mix a few drops of Dawn with water and use a damp, not wet, cloth. Rinse the area with a separate damp cloth and dry it immediately.
How do you remove years of grime from wood furniture?
Start with the gentlest method and work up. First, vacuum the surface to remove loose dirt. Then, clean with a mild soap solution and a soft cloth. If grime persists, use distilled white vinegar diluted with water (1:1) applied with a soft bristle brush, working with the wood grain. Avoid soaking the wood. Dry the surface immediately and apply a fresh coat of wax or sealer to protect the exposed wood.
How do I ensure my reclaimed wood furniture is bug-free?
Most reputable makers like Strong Oaks Woodshop kiln-dry and treat the wood before building. For pieces already in your home, inspect the joints and underside regularly for small holes or sawdust. Vacuum the piece routinely. If you see signs of wood-boring insects, isolate the piece and contact a pest control professional. Avoid using pressure washers or harsh chemicals on the furniture, as they can damage the wood and finish.